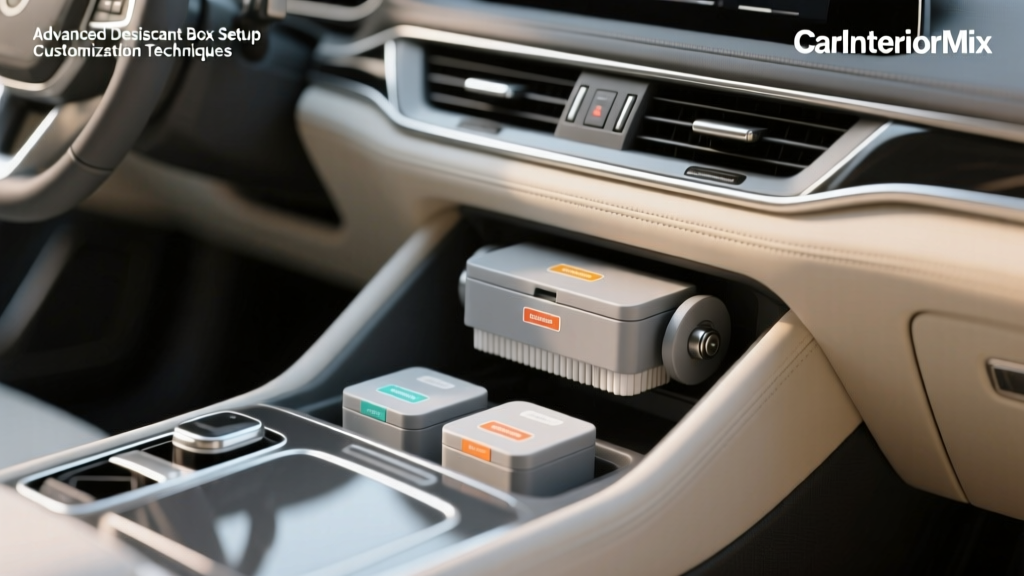
Desiccant Box Setup: Customization Techniques (2026)
Moisture is one of the sneakiest enemies inside a vehicle. It fogs windows, triggers musty odors, encourages mold in carpets, and can even contribute to electrical issues under seats or in the trunk. If you?ve ever opened your car after a rainy week and smelled that damp ?closed cabin? funk, you already understand why controlling humidity matters.
A desiccant box (sometimes called a moisture absorber box) is one of the simplest tools for improving cabin comfort. The ?advanced? part comes from how you set it up: where you place it, how you secure it, how you size it for your cabin, and how you customize it for your specific use case?daily commuting, winter storage, a convertible with occasional leaks, or an SUV hauling wet gear.
This guide breaks down advanced desiccant box setup customization techniques for car owners and enthusiasts who want results that last. You?ll get practical placement strategies, step-by-step setup instructions, product comparisons, and real-world examples you can copy.
What a Desiccant Box Does (and What It Doesn?t)
A desiccant box reduces humidity by pulling water vapor out of the air and trapping it in a chemical or physical medium. It helps prevent:
- Persistent window fogging and slow defogging
- Musty smells after rain or snow
- Mildew growth in carpets and trunk liners
- Dampness in stored vehicles and seasonal cars
What it won?t do: fix the source of the leak. If you have clogged sunroof drains, a bad door seal, or a windshield seal failure, a desiccant setup is a humidity-management tool?not a permanent repair. Use it alongside leak diagnosis and interior drying.
Choosing the Right Desiccant: Calcium Chloride vs. Silica Gel vs. Rechargeable
Calcium Chloride ?Drain-to-Reservoir? Boxes
These are the common tub-style moisture absorbers. They work fast and are affordable.
- Pros: Strong moisture pull, great for damp cars and quick results
- Cons: Produces liquid brine; must stay upright; spill risk can damage carpet
- Best for: Trunks, footwells (secured), winter humidity, temporary odor control
Silica Gel Canisters or Packs
Silica gel absorbs moisture without generating corrosive liquid. Many are color-indicating and can be recharged (oven or plug-in, depending on style).
- Pros: Low mess, safer near upholstery and electronics, flexible placement
- Cons: Slower than calcium chloride; needs periodic recharging
- Best for: Under seats, center console storage, glovebox, classic cars, daily drivers
Rechargeable Dehumidifier Units (Heated Regeneration)
These are typically silica-based units you ?recharge? by plugging into a wall outlet. They?re a favorite for garages and stored vehicles.
- Pros: Reusable, tidy, easy to track saturation
- Cons: Higher upfront cost; needs access to power for recharging
- Best for: Seasonal cars, cars parked in humid climates, people who dislike disposables
Advanced Setup Planning: Match Capacity to Your Cabin and Conditions
One small desiccant box in a large SUV can feel like bringing a paper towel to a flooded basement. Advanced setups start with sizing and environment:
- Cabin volume: Coupes/sedans need less capacity than SUVs, wagons, and vans.
- Moisture load: Wet floor mats, snow melt, water leaks, and humid climates increase demand.
- Air exchange: Cars parked outdoors or with frequent door openings will ?fight? the desiccant.
- Temperature swings: Cool nights + warm days = condensation risk, especially on glass.
Practical rule of thumb: For daily drivers, aim for one primary unit plus one ?support? unit during wet seasons. For stored vehicles, place at least two units?one in the cabin and one in the trunk?then check monthly.
Step-by-Step: Building a Spill-Safe, High-Performance Desiccant Box Setup
Step 1: Start With a Dry Baseline
- Remove wet items: umbrellas, gym bags, damp jackets, and any soaked mats.
- Vacuum carpets and seats to remove debris that holds moisture.
- If the interior is actively damp, run the HVAC with A/C on and heat for 15?30 minutes (A/C dehumidifies; heat helps evaporation).
- For severe dampness, crack windows slightly in a secure area or use a fan in the garage.
Step 2: Choose the Best Location (and Use More Than One)
Placement is where ?advanced? results come from. Good locations include:
- Trunk corner or spare tire well (secured): Great for sedans with moisture trapped in the rear.
- Front footwell (passenger side): Effective for daily humidity?just keep it stable and away from pedals.
- Under a seat (silica only): Excellent for discreet moisture control without spill risk.
- Rear footwell: Helpful for families and rideshare vehicles with frequent wet shoes.
Avoid: directly on leather seats, on sloped surfaces, or anywhere it can tip during braking.
Step 3: Create a Tip-Resistant Mount (Advanced Stability Upgrade)
If you?re using a calcium chloride reservoir-style box, stability is non-negotiable. Use one of these methods:
- Rubberized tray method: Place the box in a shallow rubber tray (like a small cargo liner cutout) to catch drips and prevent sliding.
- Velcro + flat board method: Attach industrial hook-and-loop strips to a small flat board, then secure the board to carpeted trunk liner. Strap the box to the board with a reusable Velcro strap.
- Trunk cargo net method: In SUVs/hatchbacks, place the box in a netted side pocket or behind a cargo net to prevent tipping.
Pro tip: If your vehicle has a trunk organizer, dedicate one compartment to the desiccant box and add a non-slip liner underneath.
Step 4: Add Airflow Assistance (Yes, Even Passive Desiccants Benefit)
Desiccants work better when humid air can circulate. For advanced setups:
- Don?t bury the unit under clothing, bags, or floor mats.
- Leave a small gap around it for airflow?especially in the trunk.
- If storing a car in a garage, leave interior compartments open (glovebox, center console, rear armrest pass-through if available).
Step 5: Track Saturation and Set a Maintenance Schedule
Consistency is what keeps your car interior from reverting back to fog and odor issues.
- Calcium chloride boxes: Replace when the reservoir fills or tablets dissolve. In wet seasons, check weekly.
- Silica gel: Recharge when the indicator changes color (often orange-to-green or blue-to-pink depending on type). Check every 2?4 weeks.
- Rechargeable plug-in units: Recharge on a schedule (often every few weeks) based on your climate and usage.
Real-world example: If you commute with snowy boots, your cabin moisture load spikes. A single box may last only 1?2 weeks in winter. Pair a trunk unit with a small silica pack under the passenger seat, and you?ll usually notice faster defogging and less odor buildup.
Customization Techniques for Specific Scenarios
Daily Driver in Rainy or Humid Climates
- Use a silica unit under a front seat for daily stability.
- Add a calcium chloride box in the trunk if you frequently carry wet gear.
- Swap fabric mats for all-weather floor liners to reduce moisture retention.
Winter Fogging and Slow Defrost Problems
- Prioritize moisture removal at the source: wet mats and carpets.
- Place a desiccant unit in the front passenger footwell (secured).
- Run the HVAC on fresh air periodically?recirculation can trap humidity.
Stored Car / Classic Car / Seasonal Vehicle
- Use two units minimum: cabin + trunk.
- Choose rechargeable silica to avoid liquids sitting for months.
- Crack windows slightly only if the storage area is secure and dry; otherwise keep sealed and rely on desiccants.
- Open interior compartments to reduce ?closed pocket? moisture zones.
Convertible or Vehicles with Known Minor Water Intrusion
- Don?t ?mask? the issue?still address seals and drains.
- Use a high-capacity trunk unit plus a small silica unit in the cabin.
- Inspect low points: rear footwells and under-seat areas where water hides.
Product Recommendations and Smart Comparisons
Instead of chasing one ?best? product, match the product type to how you use your car. Here?s a practical comparison approach:
Best Low-Maintenance Choice for Most Owners
- Rechargeable silica dehumidifier canister for the cabin
- Why: No liquid reservoir to spill, reusable, easy to monitor saturation
Best Fast-Acting Option for Very Damp Interiors
- Calcium chloride moisture absorber box (reservoir style)
- Why: Pulls moisture aggressively, helps stabilize humidity quickly
- Setup requirement: Must be spill-secured (tray + anchor method recommended)
Best Budget-Friendly ?Two-Zone? Setup
- One medium calcium chloride box in the trunk (secured)
- Plus: silica gel packs under seats or in door pockets
- Why: Strong main absorber + flexible support units
Buying tip: Look for clear saturation indicators, sturdy lids, and stable bases. For disposable boxes, choose designs with wide footprints and deeper reservoirs to reduce spill risk.
Common Mistakes to Avoid
- Placing a liquid-producing box on carpet without secondary containment: Brine spills can stain, smell, and corrode metal seat mounts.
- Using one tiny unit for a large vehicle: You?ll think desiccants ?don?t work? when the setup is simply undersized.
- Ignoring soaked floor mats: Damp mats constantly re-humidify the cabin and overwhelm the desiccant.
- Blocking airflow: A desiccant stuffed under a pile of bags can?t interact with cabin air effectively.
- Failing to check saturation: A full unit stops absorbing?some can even re-release odor as they age.
- Skipping leak diagnosis: If water keeps entering, you?re stuck in a loop of temporary fixes.
FAQ: Advanced Desiccant Box Setup Customization
How many desiccant boxes do I need for my car?
Most sedans do well with one primary unit, but advanced setups often use two zones: one in the trunk and one in the cabin. SUVs and hatchbacks typically benefit from two units because moisture migrates between the cargo area and passenger area.
Where is the safest place to put a calcium chloride moisture absorber?
The trunk is usually safest because it?s flatter, away from feet, and easier to secure. If you use it in the cabin, place it in the passenger footwell only if it?s in a non-slip tray and cannot slide or tip under braking.
Can a desiccant box help with windshield fogging?
Yes?especially if the fogging is caused by high cabin humidity from wet mats, snow melt, or damp carpet. Pair a desiccant setup with proper HVAC use (A/C on, heat as needed) for faster results.
How do I know when to replace or recharge my desiccant?
Disposable calcium chloride units need replacement when the pellets dissolve or the reservoir fills. Silica gel units usually have an indicator that changes color; recharge as soon as it shows saturation, particularly during rainy or winter months.
Will desiccants remove smoke or pet odors?
They can reduce musty ?damp? odors by controlling humidity, but they won?t fully remove smoke, pet, or mildew odors embedded in fabric. For that, combine humidity control with deep cleaning, enzyme treatments, and?if needed?ozone treatment done safely and correctly.
Is it safe to leave a desiccant box in the car during hot weather?
Generally yes, but heat can speed up saturation and increase the risk of spills for liquid-producing absorbers. In hot climates, silica or rechargeable units are often the safer, cleaner choice for cabin placement.
Actionable Next Steps
- Fix obvious moisture sources first: dry mats, check door seals, inspect trunk seals and sunroof drains.
- Pick the right desiccant type: silica for low-mess cabin control; calcium chloride for fast moisture pull (secured); rechargeable units for storage.
- Build a two-zone setup: one unit in the cabin, one in the trunk for more consistent humidity control.
- Secure and maintain: use a tray or anchor method, then check saturation on a schedule.
If you want more no-nonsense interior care tips?odor removal, deep cleaning routines, and smart storage strategies?explore the rest of our guides on carinteriormix.com.